AutoPlay option determines how will Windows 10 handle with our files on CD and DVD drives or other portable media. The purpose of this feature is to discover disc or any type of storage inserted on your computer and ask you what action you want to perform on your files. For many users, this option is very annoying, but don’t worry, you can disable it with ease. This guide will show you how to enable, disable, and customize AutoPlay in Windows 10.
You may also read: How To Disable Login Screen In Windows 10
How to enable, disable, and customize AutoPlay in Windows 10.
Turn on or off AutoPlay in Settings
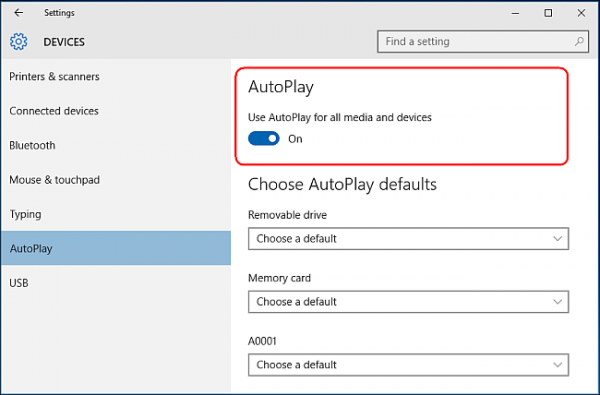
Go to <Settings> and click on <Devices> icon. Scroll down and choose <AutoPlay> option and turn it off for all devices. After this, you will never be bothered with AutoPlay pop-up window. But if you don’t want to turn it off for all devices, you can customize it under <Choose AutoPlay Defaults>.
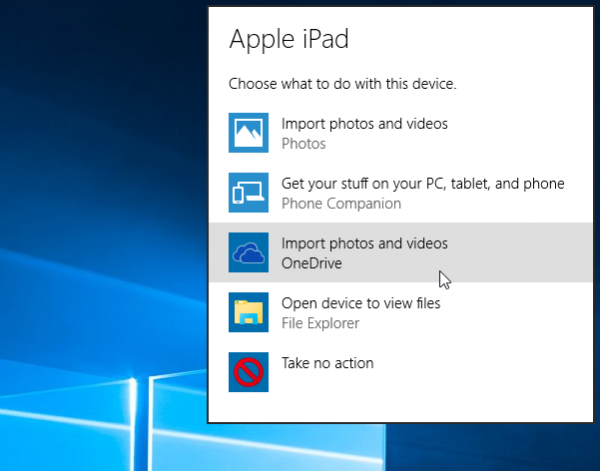
You can simply choose the default action for any type of the device you connect to the PC or laptop, and it could be USB drive, mobile phone or memory card. There are three choices to be selected for every single device: <Open folder to view files>, <Configure this drive for backup>, <Import photos or videos> and <Take no action>. With these settings, you can turn off AutoPlay option for each device separately.
www.howtogeek.com
Turn on or off Autoplay in Control Panel
Windows 10 settings are limited for some settings of AutoPlay, so some of the media can’t be configured through it. There are many devices for which you might want to set up AutoPlay option, but it is possible only through Contol Panel which enables the full control over audio CDs, Blu-ray discs and other.
To open Control Panel, point the mouse to <Start> icon and hold right-click until the menu appears and then click on Control Panel. Under the <Hardware and Sound> click on AutoPlay icon and check or uncheck the <Use AutoPlay for all media and devices>.
With these settings you can choose the default action for any device like with the Settings application: <Open folder to view files>, <Configure this drive for backup>, <Import photos or videos> and <Take no action>. At the end of the page, there is option <Reset all defaults> to back all settings to the original state.
There is no difference between Windows 10, 8.1 and 7 appearance of the AutoPlay’s window, but there is a lot of new types of media added for which you can set the AutoPlay behavior, for example, camera storage or removable drives.
www.groovypost.com
Turn on or off AutoPlay for the Group Policy Editor
If you are an average user, you can turn on and off AutoPlay from Control Panel or Settings app, but if you want to turn off AutoPlay for other users on the same computer, you can use the Group Policy Editor.
Click on the search icon and type <gpedit.msc> and go to Computer Configuration > Administrative Templates > Windows Components> AutoPlay Policies. At the top of the right panel, you will see <Turn off AutoPlay>, double-click on it and choose enabled. There you have available options: <All drives> and <CD-ROM and removable media drives>. Choose one and that’s all.
Image Source: accellis.com
See also: How To Configure Do Not Disturb Mode In Windows 10