
Windows 10, Microsoft operating system was released in 2015. This version has got lots of positive reviews. The number of errors that previous versions had was reduced, and the whole system is pretty smooth and very easy to use. If you recently switched from Mac to a PC, or from Windows 7 or 8 to Windows 10, you may spend a bit of time getting to know how this one works. But don’t worry, you’ll get used to it and all of its features fast. Here, we are going to show you how to set Windows 10 screensaver. Let’s move to the steps.
See also: How to delete saved Windows 10 passwords
There are six screensavers which come as built-in with Windows 10. For Windows 10 version, you need to follow these few steps.
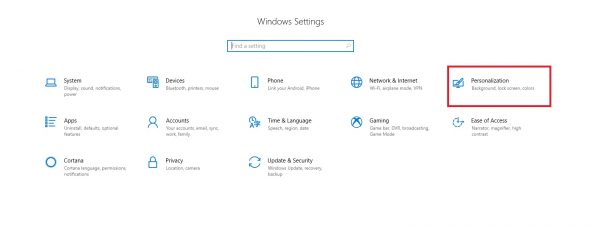
- First, you need to go to the “Settings app”. You can press Windows + I to go there.
- Once you are there, you will find a “Personalization”. Click on that.
- After going into Personalization settings, search for the “Lock screen” at the left side and click on it.
- In the “Lock Screen settings”, you will find “Screen Saver Settings”.
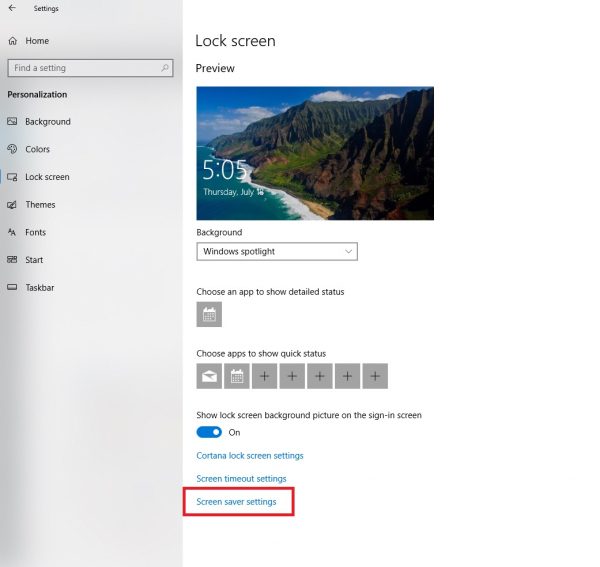
- Click on the “Screen Saver Settings”. A window will appear on your screen. On that window, there are many options for adjusting the screensaver according to your choice.
- The six default screensavers in Windows 10 are Blank, Mystify, Bubbles, 3D Text, Ribbons and Photos. You will find a screensaver menu. From that drop-down section, select which screen saver you want for the screen.
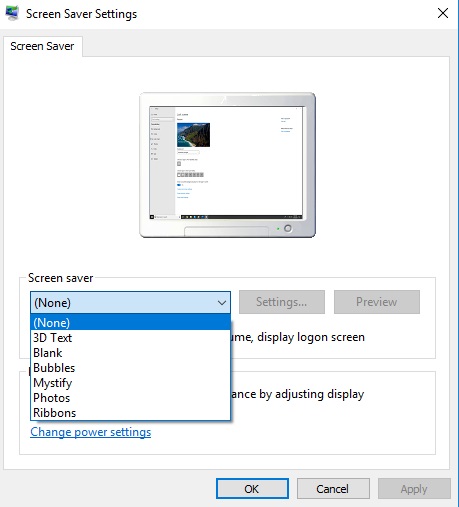
- There is another section named settings. You can make little changes of that screensaver. There are options for text customization.
- If you do not like the default screensaver and want to make your own screensaver from the collection of your photos, go to the Photos screensaver. Then select the photos for the screen saver. The photos of your choice will be on the display as the screensaver.
- There is also a “Preview” option for you to see, how your screensaver will look after finishing the settings.
- You will also see a “Wait” option which gives you the chance to set the minutes keep the screen saver inactive before it finally turns on.
- There is another option “On resume, display the login screen”. This is used for locking the smart device automatically after turning on the screensaver.
- After finishing every step, save it.
- Finally, click on the Apply and Ok button.
Then the screensaver will be activated on your device according to your specified settings.
If you often change the screensaver settings, it is wise able to create a shortcut on the desktop. Here is how to do that:
- First, right-click on the desktop and go to New > Shortcut.
- There is a location space in that wizard. Type “control desk.cpl,,@screensaver” in that location.
- Then click the Next button and name the shortcut. You can now change the settings frequently as per your preference without any trouble.